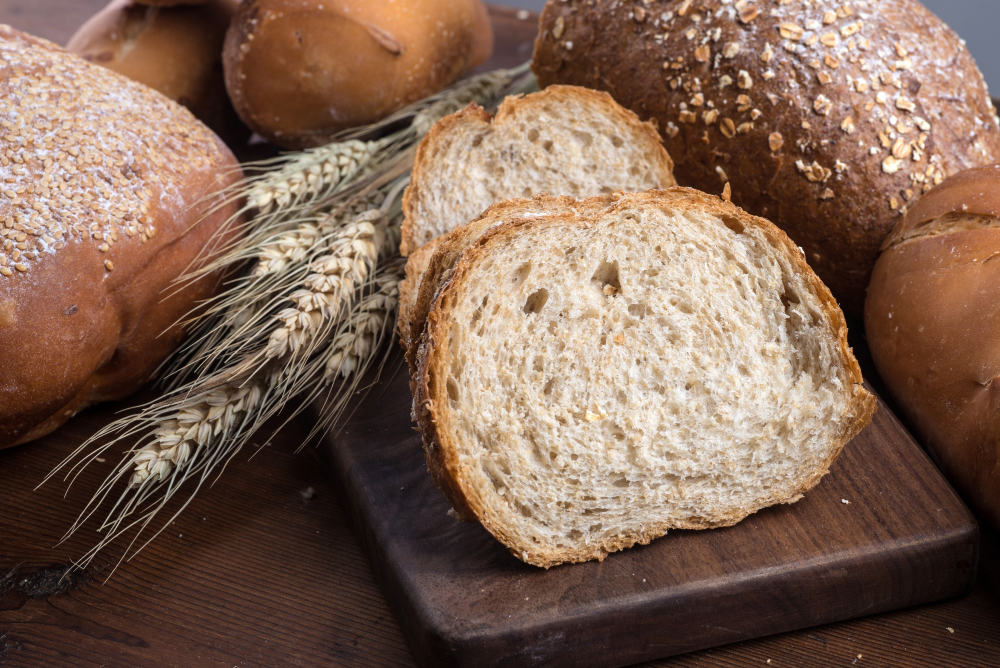
Picture the warm, inviting aroma of freshly baked bread filling your home, drawing everyone to the kitchen with its comforting scent. Making delicious homemade bread is easier than you think, requiring just five simple ingredients you likely already have in your pantry.
You’ll be amazed at how simple ingredients like flour, yeast, and water come together to create a perfect loaf with a golden, crispy crust and a soft, airy interior. Thanks to the science behind the process, this reliable recipe is ideal for both beginner and seasoned bakers.
By following this guide, you’ll learn how to mix and bake your dough to perfection, achieving consistent results that rival artisan bakeries.
Table of Contents
The Magic of Simple Homemade Bread
With just a handful of ingredients, you can create a delicious loaf of bread. This simple bread recipe yields a product that’s not only delicious but also packed with benefits that store-bought bread can’t match. The process involves mixing flour, yeast, and other essential ingredients to form a dough that, with time, develops into a beautiful loaf.
Why This Recipe Works
The success of this recipe lies in its simplicity and the quality of its ingredients. By using basic components like flour, water, yeast, and a bit of salt, you create an environment where the dough can develop a rich flavor and a satisfying texture. The longer fermentation time allows the yeast to fully develop, contributing to the bread‘s complex taste.
What Makes This Bread Special
This bread stands out due to its lack of preservatives and artificial ingredients, making it a healthier option. The dough‘s natural fermentation process creates a crust that’s crispy on the outside and tender on the inside, a characteristic of artisanal bread. The texture is marked by irregular holes and a chewy crumb, features that are typically associated with high-quality, handmade bread. Moreover, the proper hydration ratio ensures that the bread stays fresh for longer.
Essential Ingredients for Perfect Homemade Bread
The foundation of great homemade bread lies in its simple yet crucial ingredients. To make a delicious loaf, you’ll need to focus on the quality and type of ingredients you use.
Flour Options: Bread Flour vs. All-Purpose
Choosing the right flour is the first step in making great homemade bread. You can use either bread flour or all-purpose flour. Bread flour has a higher protein content, which results in a chewier texture, while all-purpose flour provides a balanced texture suitable for a variety of bread types.
Yeast: Types and Substitutions
Yeast is an essential ingredient in homemade bread, driving the fermentation process. Whether you choose active dry yeast, instant yeast, or dry yeast, each type has distinct qualities and recommended amounts. Knowing these differences is important to ensure the best baking results.
Salt, Water, and Sweetener
In addition to flour and yeast, salt, water, and a sweetener like sugar are necessary. Salt enhances flavor, water hydrates the dough, and sugar feeds the yeast, promoting fermentation.
Optional Add-ins for Flavor
To give your bread a unique twist, consider adding various ingredients. You can incorporate herbs like rosemary or thyme, cheese such as cheddar or parmesan, seeds and nuts for added texture, or dried fruits and spices for sweeter variations. These add-ins can significantly enhance the flavor profile of your bread.
Equipment You’ll Need
To successfully make homemade bread, you’ll need to equip your kitchen with a few key items. Having the right equipment can make a significant difference in the quality of your bread. This includes tools for mixing and kneading the dough, as well as vessels for baking.
Basic Tools for Mixing and Kneading
For mixing and kneading, you’ll need a handful of basic tools. A large mixing bowl is essential for combining your ingredients. You can either use a stand mixer fitted with a dough hook or knead the dough by hand on a lightly floured surface to keep it from sticking.
Baking Vessels: Loaf Pans vs. Dutch Oven
For baking, you have several options. Standard loaf pans (9×5 inches) are ideal for creating traditional sandwich-style bread shapes that are perfect for slicing. Alternatively, a Dutch oven or cast iron pot with a lid can be used to create steam during baking, resulting in an artisan-style crust with a crispy exterior and a tender interior. You can also use baking stones or steel for free-form loaves, which provide excellent heat distribution.
Some other considerations include using parchment paper to prevent sticking and make transferring the dough easier. The material of your baking vessel can affect crust development, with darker pans creating darker crusts. It’s also important to consider the size of your oven when selecting baking vessels to ensure optimal heat circulation.
Preparing Your Bread Dough

To make the bread, you need to start by preparing the dough, a process that requires some care and attention. The quality of your dough will directly impact the final result of your bread, making this step crucial in the bread-making process.
Activating the Yeast
The first step in preparing your dough is activating the yeast. If you’re using active dry yeast, you’ll need to dissolve it in warm water (around 100°F to 110°F) before adding it to your other ingredients. This step, known as “proofing” the yeast, ensures that your yeast is alive and will help your dough rise. Just mix the yeast with warm water in a small bowl, let it rest for 5 to 10 minutes until it turns frothy, then continue with your recipe.
Mixing the Ingredients
Once your yeast is activated, you can start mixing the ingredients. In a large bowl, combine your flour, salt, and any other dry ingredients your recipe calls for. Make sure to measure your ingredients accurately to achieve the right balance. Gradually add the yeast mixture and any other wet ingredients to the dry ingredients, stirring until a shaggy dough forms.
Kneading Techniques for Beginners
Kneading is a critical step in developing the gluten in your dough, which gives your bread its structure and texture. To knead, start by placing your dough on a floured surface. Using the heel of your hand, push the dough away from you, then fold it back toward you. Rotate the dough a quarter turn and repeat this motion. Continue kneading by hand for 8–10 minutes until the dough is smooth and elastic. Alternatively, you can use a stand mixer with a dough hook attachment, which usually kneads the dough in 5–7 minutes.
Some key points to keep in mind while kneading:
- Kneading develops gluten, creating the structure that traps gas bubbles and allows bread to rise properly.
- Avoid adding too much flour during kneading, as this can create a dense loaf – a slightly sticky dough is preferable.
- If the dough becomes too sticky, let it rest for 5 minutes before continuing.
- The “windowpane test” can help determine if kneading is complete: stretch a small piece of dough; if it forms a thin, translucent membrane without tearing, it’s ready.
The First Rise: Keys to Success
As you embark on the bread-making journey, the first rise is a critical step that sets the stage for a perfect loaf. This stage is where the magic happens, and your dough begins to transform into the bread you desire.
Creating the Ideal Rising Environment
To ensure a successful first rise, you need to create an ideal environment for your dough. This involves maintaining the right temperature, typically between 75°F to 80°F (24°C to 27°C), and providing a draft-free space. You can place the dough in a lightly oiled bowl, cover it with plastic wrap or a damp cloth, and let it rise in a warm, cozy spot. The time it takes for the dough to double can vary, usually taking around 1 to 2 hours at room temperature.
How to Tell When Dough Has Doubled
Determining when your dough has doubled in size is crucial. Here are some methods to check:
- Visual assessment: The dough should roughly double in size compared to its initial state.
- Press test: Gently press two fingers into the dough; if the indentation remains, it’s ready.
- Texture change: The dough will become light and puffy, with visible gas bubbles just beneath the surface.
- Marking the bowl: Use a rubber band to mark the starting level on a clear bowl, making it easier to track the rise.
Properly risen dough will have a slightly domed top and fill more of the bowl. Be cautious of over-proofing, which can cause the dough to collapse when poked.
Shaping Your Loaves

The art of shaping your loaves is where your bread begins to take form. After the first rise, your dough is ready to be transformed into its final shape before baking. This step is essential because it influences not just the bread’s appearance but also its texture and crumb structure.
Basic Loaf Shaping Technique
To shape a basic loaf, you start by gently deflating the dough on a lightly floured surface. For a round boule, you pull the dough edges toward the center, then rotate and tuck underneath to create tension. This technique helps in creating a smooth surface and a well-structured crumb.
Alternative Shapes and Styles
Different bread shapes require different techniques. For instance, baguettes are made by stretching the dough into a rectangle, folding it lengthwise, and then rolling it into a long cylinder. You can also make dinner rolls by dividing the dough into equal portions and shaping each into a tight ball. Other styles like braided loaves, focaccia, and ciabatta each have their unique shaping techniques. The key to all shaping is creating enough surface tension without degassing the dough completely.
By mastering these shaping techniques, you’ll be able to create a variety of bread types, each with its unique characteristics, enhancing your homemade bread experience.
The Second Rise and Preparing to Bake
Now that your dough has risen, it’s time to focus on the second rise and preparation for baking. This stage is crucial for developing the flavor and texture of your bread. After shaping your loaves, you’ll need to let them rise again, allowing the yeast to continue its work.
Signs Your Bread is Ready for the Oven
During the second rise, your dough will continue to expand. To check if it’s ready for baking, gently poke the dough; if it springs back slowly, it’s ready. You can also check by gently lifting the edge of the dough; if it holds its shape and doesn’t collapse, it’s a good sign that your bread is ready to be baked.
Getting your oven preheated to the correct temperature is essential. Most bread recipes recommend setting it between 375°F and 425°F (190°C to 220°C). Ensure you preheat your oven with a baking stone or baking steel inside, if you have one, to achieve a crispy crust.
Scoring the Dough for Beautiful Results
Scoring, or slashing, the dough is both an art and a science. It controls where the bread expands during baking, preventing random cracks and creating a beautiful crust. Use a sharp knife, razor blade, or a specialised bread lame to make clean slashes about ¼ to ½ inch deep.
- For sandwich loaves, a single lengthwise slash or several diagonal cuts work well.
- Round loaves benefit from a cross-pattern or square grid on top.
- Baguettes traditionally receive diagonal slashes along their length.
Make decisive, quick cuts rather than dragging the blade, which can tear the dough. Scoring is best done immediately before placing the bread in the oven. This technique not only adds to the aesthetic appeal but also helps in achieving those beautiful “ears” of crust.
Baking Your Homemade Bread to Perfection
To bake your homemade bread to perfection, you need to understand the nuances of temperature and timing. Baking is the final and most important step in the bread-making process, so it’s essential to do it correctly.
Temperature and Timing Guidelines
Preheating your oven to the right temperature is essential. Most bread recipes suggest a temperature between 375°F to 425°F. The baking time can vary from 25 to 45 minutes, depending on the size of your loaf and the oven you’re using.
Creating Steam for a Crispy Crust
Creating steam in the oven helps to achieve a crispy crust. You can do this by placing a pan of water in the oven or by using a Dutch oven. Steam helps to create a golden brown crust that’s crunchy on the outside and soft on the inside.
How to Tell When Bread is Done
There are a few reliable methods to determine if your bread is fully baked. The crust should be a golden brown color, and tapping the bottom of the loaf should produce a hollow sound. Additionally, the internal temperature should reach about 190°F for enriched dough and between 200-210°F for lean dough. Be sure to let your bread cool for at least 20 minutes before slicing.
For perfectly baked bread, make sure your oven is properly preheated. If the crust starts to brown too fast, cover the loaf loosely with aluminium foil to avoid over-browning. By following these guidelines, you’ll be able to preheat oven and bake your homemade bread to perfection.
Delicious Variations of Basic Homemade Bread
Take your homemade bread to the next level with these simple yet delicious variations. Once you’ve mastered the basic homemade bread recipe, you can start experimenting with different flavors and ingredients to create unique breads that suit your taste preferences.
Cinnamon Swirl Bread
One of the most popular variations is Cinnamon Swirl Bread. To make it, you’ll need to add a mixture of sugar, cinnamon, and sometimes butter to the dough before rolling it out and rolling it back up. This creates a beautiful swirl pattern inside the bread, making it perfect for breakfast or as a snack.
- Mix 2 tablespoons of sugar with 1 teaspoon of cinnamon.
- Evenly spread the mixture across the dough, making sure to leave a small border along the edges.
- Roll the dough tightly and cut it in half lengthwise for a beautiful swirl effect.
Herb and Cheese Options
For a savory twist, consider adding herbs and cheese to your bread dough. Chopped rosemary, thyme, or oregano can add a wonderful aroma, while grated cheese like parmesan or cheddar can enhance the flavor. Simply mix your chosen herbs and cheese into the dough during the kneading process.
- Choose your favorite herbs and cheese to create a unique flavor combination.
- Add the herbs and cheese during the kneading process to distribute them evenly.
Whole Wheat and Multigrain Adaptations
You can also experiment with different types of flour to create whole wheat or multigrain bread. Substituting up to half of the bread flour with whole wheat flour will result in a more robust and hearty loaf. Don’t forget to adjust the water content accordingly, as whole wheat flour absorbs more water.
- Replace up to half the bread flour with whole wheat flour for added fiber.
- Increase water by about 2 tablespoons per cup of whole wheat flour.
- Consider adding a handful of mixed seeds or cooked grains for extra texture and flavor.
Storing and Enjoying Your Freshly Baked Bread
Now that your homemade bread is baked, let’s explore how to keep it fresh for as long as possible. Proper storage and handling are crucial to maintaining the quality and flavor of your bread.
Cooling and Slicing Tips
After baking, it’s essential to cool your bread properly.Set the bread on a wire rack to let air circulate all around it, preventing trapped moisture that could cause sogginess. It’s tempting to slice into the bread immediately, but resisting this urge for at least an hour allows it to cool and set, making it easier to slice cleanly.
Storage Methods to Maintain Freshness
To keep your bread fresh, store it in an airtight container or wrap it tightly in plastic wrap or a cloth. You can also use a paper bag, but avoid using plastic bags directly on the bread as they can trap moisture. If you plan to consume the bread within a day or two, storing it at room temperature is fine. For longer storage, consider other methods.
Freezing Instructions for Later Enjoyment
For longer-term storage, freezing is an excellent option. Freeze the bread when it’s completely cool, ideally within 24 hours of baking. You can slice sandwich bread before freezing for easy toasting directly from frozen. Wrap the bread tightly in plastic wrap, then in aluminum foil, or place it in freezer bags with the air removed. Frozen bread maintains its quality for up to 3 months. To thaw, leave the bread wrapped at room temperature for a few hours or overnight. Refresh the thawed bread by heating it in a 350°F oven for 5-10 minutes.
Conclusion
You’ve learned how to transform simple ingredients into delicious homemade bread using just 5 ingredients. The process connects you to culinary traditions that span thousands of years, and the satisfaction of creating something essential and delicious is unmatched.
Remember, bread making is both science and art. Follow the bread recipe guidelines while developing your intuition about how dough should look and feel. Don’t be discouraged by initial challenges; each loaf teaches you something new.
As you master this basic recipe, feel free to experiment with different flours, shapes, and add-ins. The versatility of this fundamental bread recipe allows for endless variations. Share your homemade bread with others, and enjoy the process and delicious results of your efforts.
With practice, you’ll develop an intuitive understanding of the bread-making process, and the joy of baking fresh bread at home will become a rewarding experience.


Leave a Reply